Tomin no worries

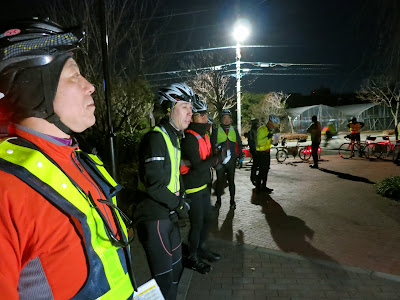
“It’s going to rain on Saturday,” somebody on the adjacent table mentioned. “Oh really? I’ve been looking forward to rain for weeks, to be able to test my disc brakes!” I blurted out and the room suddenly went silent. Everybody was giving me a look that made it perfectly clear that this wasn’t the sort of comment that will win you popularity contests at a monthly bike meeting.

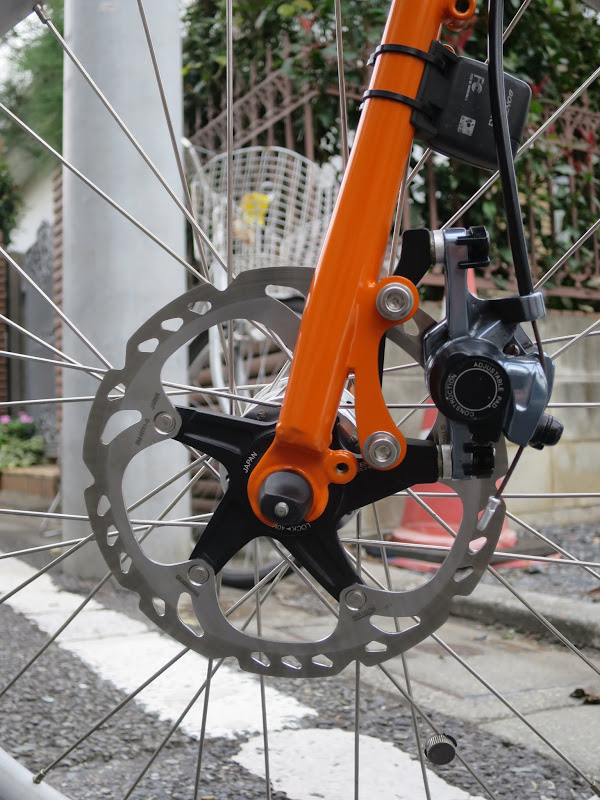
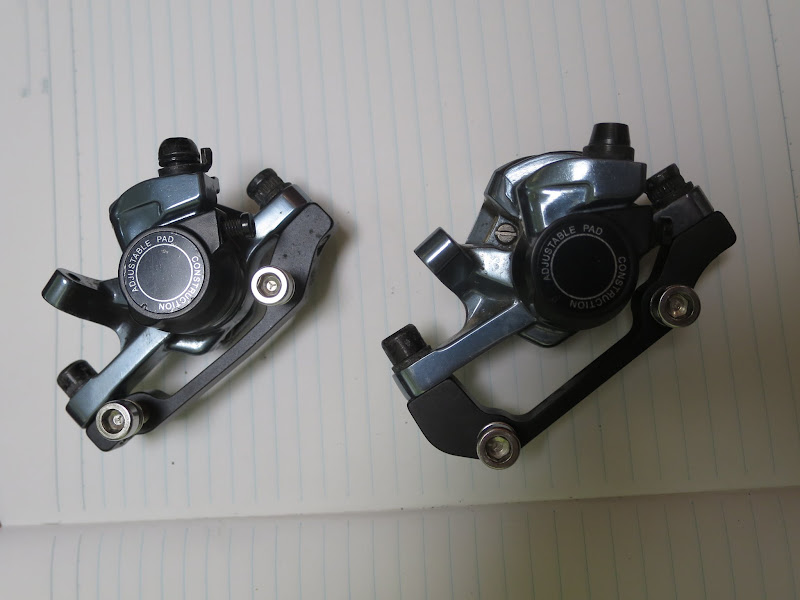
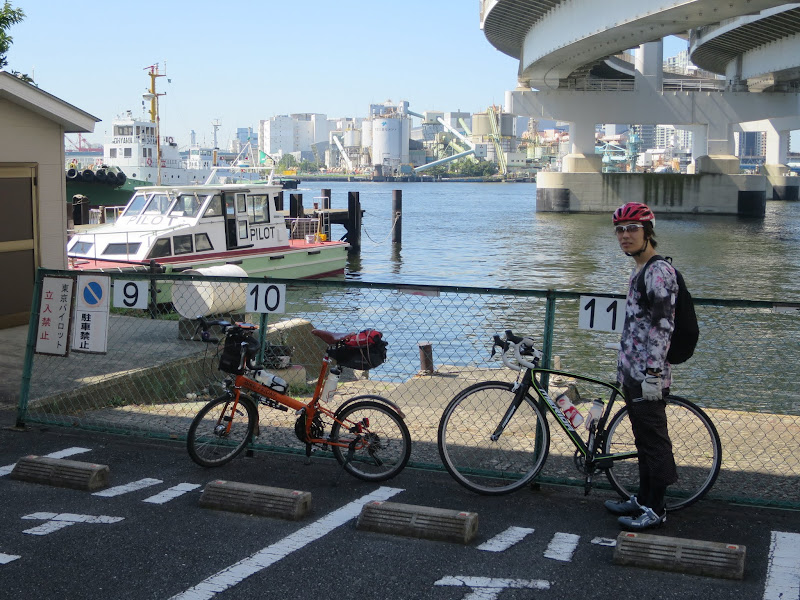
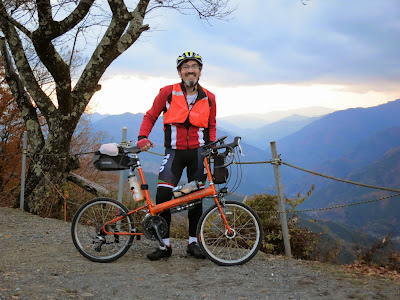
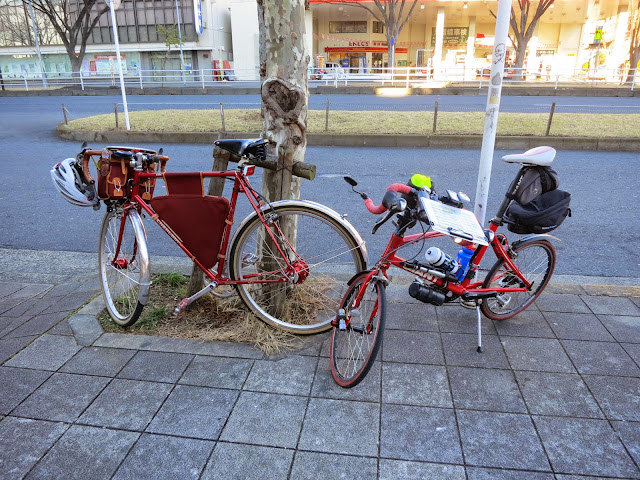
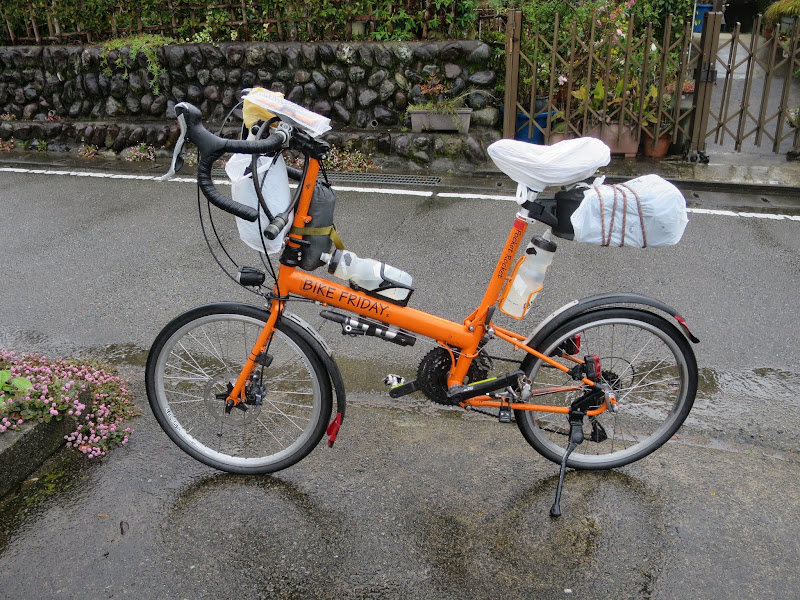
But it was true. The lack of reliable braking in the rain was the main reason why I had swapped the cantilever brake on the front fork of my Bike Friday for a disc brake (after upgrading to a new fork). Since then I hadn’t had the chance to test the new brake under the atrocious conditions I had wanted it for. I finally wanted to know how much difference the new brake would make.

So when the rainy forecast for Saturday remained unchanged by Friday afternoon, I announced to my wife that I was going to do a rainy ride the next day. The forecast was for light rain in the morning and heavier rain in the afternoon and evening, with 12 mm falling during daytime. Temperatures were supposed to be in the 12-16 C range.

“I’ll do the ride because I can,” I told my wife. I don’t ride in the rain because it was so much fun (usually it isn’t, even though atmospheric views and the resulting pictures often make up for some of the inconveniences), but because I don’t want to let the weather scare me. A lot of aspects of randonneuring can be intimidating, such as the distances or the amount of climbing or riding at night or sleep deprivation on 20+ hour rides. Much of the challenge of randonneuring is mental, i.e. having the confidence that you can do the ride despite all the challenges. The only way to build and maintain that confidence is to keep doing challenging rides.

When I sign up for brevet rides, I don’t know in advance what the weather will be like on the day. If it rains, I’ll still show up for the ride — it’s only water 😉

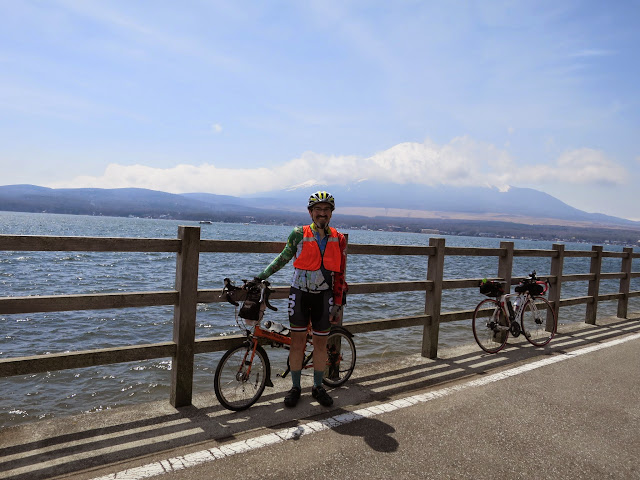
This year on the Easter weekend I had done a 400 km two day ride by myself in near constant drizzle for much of the ride. The year before I had done a 300 km brevet around Mt Fuji, with rain for the first 150 km.

I own two different rain jackets, a pair of nylon pants and various gloves. My friend Jose once told me, “There is no such thing as bad weather, only the wrong clothes!” Over the years I have built some experience in how to deal with wet and cold weather on bike rides.

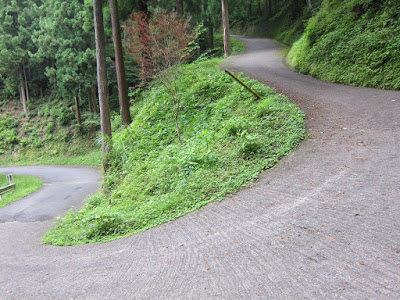
My goal was Tomin no mori (“Tokyo citizens’ forest”), a hiking trail head in the mountains west of Musashiitsukaichi station. To me the the real gateway to cycling in the mountains in Japan is not Mt Takao on the western edge of Tokyo but Tomin no mori. It’s not the steepest route, at up to 8-10 % on the steeper part of the final 10 km, but at 26 km from the station it is long and remote enough to test you and at about 1000 m elevation high enough for the temperatures to significantly change from below. If you have made this climb, you will be ready for any surfaced mountain road anywhere in Japan.

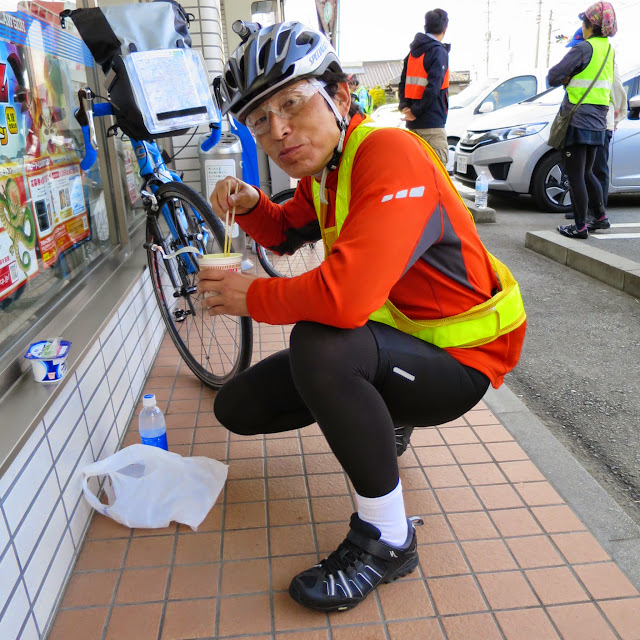
I started the ride around 08:00 wearing my rain jacket. After a while I could feel my knees getting colder and wetter from the drizzle, so I put on my nylon pants. On the way to Musashiitsukaichi (49 km from home) I stopped twice for coffee and food. After another break at a Familymart I headed up the mountain valley.

Normally the road to Tomin no mori is popular with cyclists, motorcyclists and boy racers in souped-up cars, especially on the weekend. Almost every time I cycle up there I come across the sound of an ambulance or police car rushing to an accident site. This weekend was different. I didn’t see any other bicycles or motorbikes. A guard at some road works told me he had seen maybe four other bicycles the whole day.

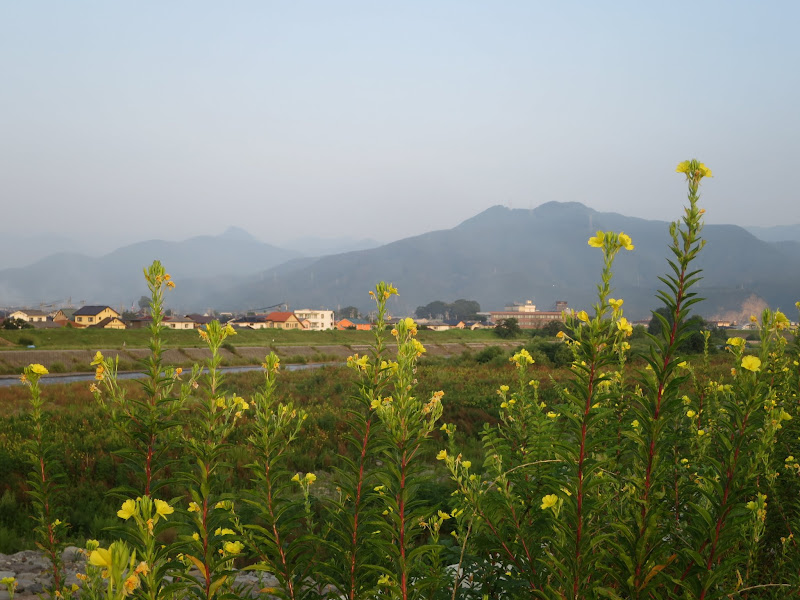
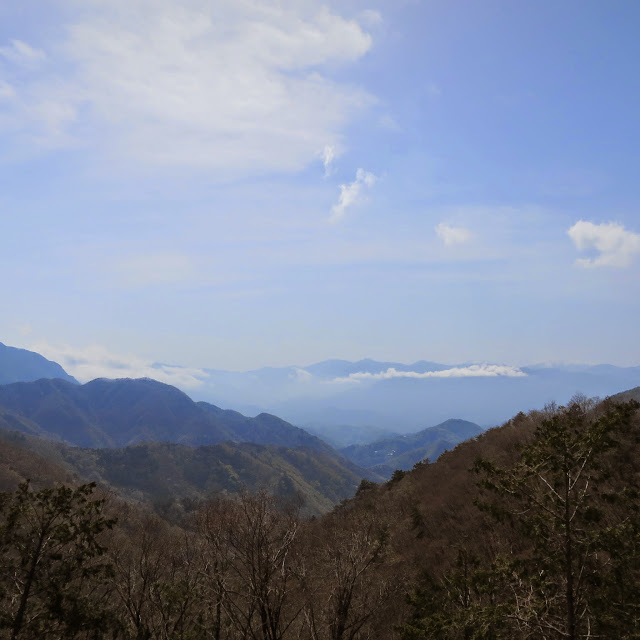
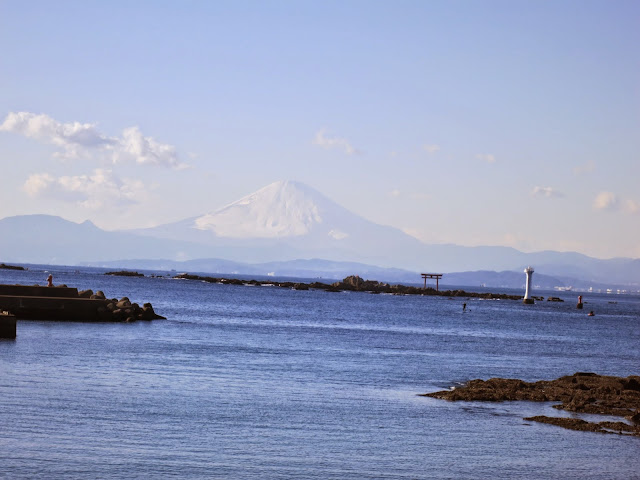
I loved the momiji (Japanese maple) leaves in green, yellow and red and the steaming clouds hanging over the forests.

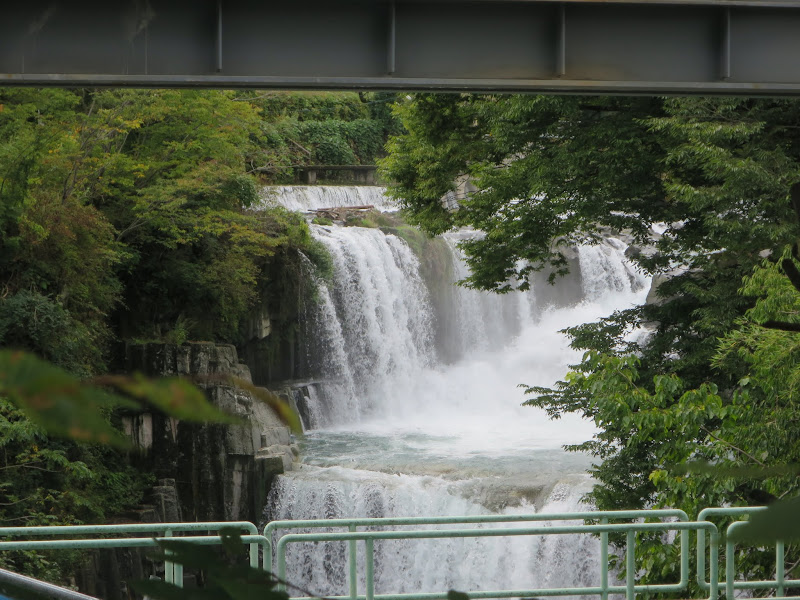
Three km from the top I passed a water fall. Even though the temperature was dropping, I felt warmer and warmer as I was working hard on the climb. I knew the descent would be much colder.

Finally I reached the entrance to the trail head. I parked the bicycle and ordered sansai (mountain vegetable) pizza with coffee.

The rain had picked up while I had my meal, just as predicted by the forecast for the later afternoon and evening.

When I started the ride, I had considered three route options: 1) to Tomin no mori and back down again. 2) to Kazahari toge, the pass a few km above Tomin no mori and back and 3) over the pass and down to Lake Okutama, then downhill to Oume and down the Tamagawa for maximum distance. As I headed out I quickly decided that 1) was the only sensible option, given the real risk of hypothermia with my rain soaked shoes, gloves and sweaty clothes under the rain gear. I wasn’t even wearing a long sleeved jersey under my jacket and had brought no extra layers or dry clothes to change into.

The first 10 km of descending down towards Musashiitsukaichi were the coldest because it was so steep, I couldn’t really pedal to generate heat. After the route flattened out a bit I could work more and the chill eased off, though with wet feet and gloves it never became all that warm.

The disc brake was OK but had too much travel. I found the brake levers hit the drops before the brake was fully engaged. What had happened was that during the previous weeks I had done several mountain rides which had worn the pads and I had not readjusted the brakes to compensate. It was only when I got back to the Familymart that I got out my Allen keys and adjusted the inner pad to remove the excess play in the system that the brake started working as it should. I wish I had done that before the ride.

I had one nasty experience about 15 km from home: At one level crossing the road crossed the rails not at a right angle but diagonally and just as I was wondering how the gap would play with my tyres, the wheels went out under me as they slipped on the wet steel. I landed hard on my left knee and elbow. Though my rain jacket was OK, my nylon pants were torn at the knee and I had some abrasions on my skin. Next time I have to cross rails like that in the rain, I’ll walk the bike…

I got home without further incident after 150 km with 1200 m of elevation gain in the rain.

Next time I’ll do a ride like this I’ll bring along an extra layer for the cold descent and maybe a pair of dry socks and gloves as well. I’ll treat wet railway crossings with even more respect than metal sewer lids and any metal grates, because all of them are accidents waiting to happen.

I managed to keep my phone dry with a plastic cover, protected my camera in my breast pocket and kept the spare battery and USB cable for recharging the GPS out of the rain with strategically placed plastic bags.

I am still looking for a good way to keep my feet dry in the rain. I tried Bicycle Line shoe covers, but the largest size available was too small for my shoe size.

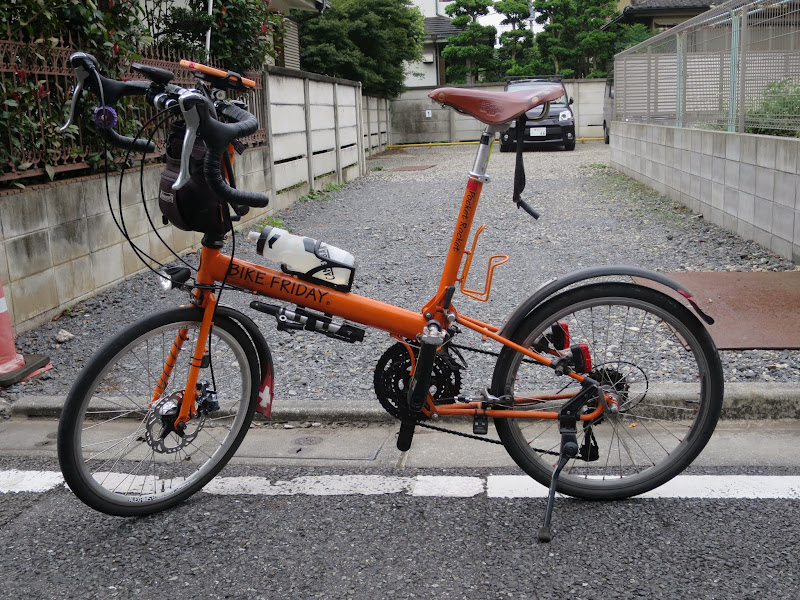
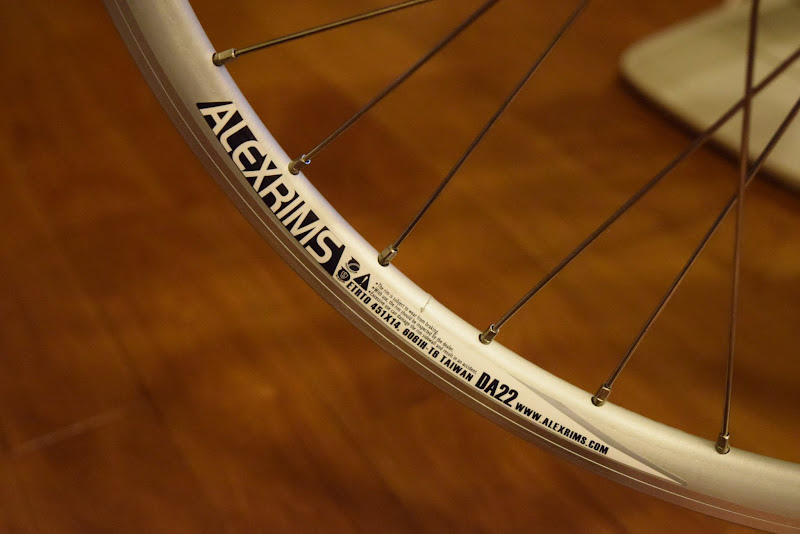
Also I need to figure out why despite mudguards at the front and the rear I end up with dirt water being sprayed onto the seat post bag and my back. Really, I need to find myself a better pair of mudguards, but there isn’t much choice for the 20 inch ETRTO 451 wheels of my Bike Friday Pocket Rocket.

Despite the accident and notwithstanding the coldest part of the descent, I wasn’t too uncomfortable for most of the ride and am glad to have seen the autumn foliage views around Hinohara village.

Disc Brake on my Bike Friday

Today I visited Bike Friday dealer ehicle in Shinjuku, Tokyo to have a disc brake installed on the new fork that Bike Friday has made for my 4 year old bike. I had bought the Shimano BR-CX77 calliper second-hand from a friend. This conversion will make for much more consistent braking on rainy brevets or on wet shopping rides.

There was one small issue but it was quickly solved by ehicle. My friend had also given me a SM-MA-F160P/S adapter for fitting a post mount calliper like the BR-CX77 to an IS tab front fork with a 160 mm rotor. That’s exactly what I had on the Bike Friday. However, it did not fit together, the calliper sat too far out from the adapter. Comparing with the setup of a disc-equipped Bike Friday Silk in the shop we found that its Avid BB7 calliper was mated to a Shimano SM-MA-F180P/S, which is meant for a 180 mm rotor at the front or 160 mm at the rear (F180P/S = R160P/S). The adapter I got from my friend was for use with a 160 mm rotor at the front or 140 mm at the rear (F160P/S = R140P/S).

The use of a 160 mm rotor with an F180 adapter (i.e. R160) on the Silk fork suggests that the IS tab to axle distance on the BF fork is the same as on a standard rear setup. This means it takes a 180 mm front adapter for a 160 mm rotor or a 160 mm front adapter for a 140 mm rotor. This is very interesting, since Shimano doesn’t make 140 mm front P/S adapters: Using Shimano parts, you can’t normally use a 140 mm rotor at the front with an IS tab fork, but with Bike Friday’s setup you can because the spacing is like at the rear, where Shimano does support 140 mm rotors with IS tabs. The only thing you give up by using rear spacing at the front is the ability to use 203 mm rotors, but the fork doesn’t have enough clearance for those anyway and they’re not needed on a 20″ wheel bike. The smaller wheel means that a smaller rotor can match or beat a bigger rotor on a 700C wheel on stopping power, though heat dissipation for long descents still depends on rotor size.

Anyway, a cheap 180 mm Shimano adapter instead of the 160 mm one that I had brought along solved the issue and I could use the new brake with the 160 mm rotor on the new fork. The B&M dynamo headlight moved from the brake bolt in the fork crown to its own bolt in the same place. ehicle installed a longer brake cable for me to accommodate the different brake location.

I love the new brake, both its stopping power and modulation. It should make a huge difference on rainy rides, where I have always been uncomfortable with rim brakes, in particular on brevets where I don’t know what the weather will be like on the day when I sign up for an event. I’ve done one 300 km brevet where it was raining for 150 km.

I’d like to thank ehicle for their friendly and efficient service and recommend them to anyone interested in or already riding a Bike Friday 🙂

The last brevet of the season

BRM926 AJ NishiTokyo 200 km Kintaro on September 26 was the last brevet of the year for me, even though the Japanese Randonneuring season runs until October: I won’t able to attend AJ NishiTokyo’s West Izu brevet on October 17 due to business travel.

I had not prepared particularly well for BRM926. After a heat wave in early August we had lots of rain, then one of my brothers visited from Germany, then I traveled to the US again. I did not really get to do as much cycling as usual. So far I had not experienced any DNF (Did Not Finish) on any of my 200 km brevets, but I was a bit worried that this could be the first time on this very hilly course.

I got up at 03:45. In the front car of the first train heading out to Machida I met two other participants. In front of the station I unpacked the bike in the rain and rode out to the start (5 km) with one of the other guys. On the way the rain stopped and I took off and packed away my rain gear before the ride briefing. A week before the event, the weather forecast had predicted rain, but as the week progressed it gradually improved.

The day started off cool and never got too hot, but mostly staid dry. Around higher elevations, especially after going over a pass or through a tunnel through a mountain range we encountered slight drizzle again (really, we were just riding through clouds). The strongest was crossing from the Yamanakako side of Kagosaka Toge to the Gotemba side. But the drizzle always stopped when elevation dropped and we got out of the clouds again.

The course had three convenience store check points (point de contrôle, PC) roughly 60 km apart, as well as one quiz point and one manned but untimed check point. It headed from Machida via route 35/Akiyama to Tsuru and from there up to Kawaguchiko. After circling the lake it headed past Yamanako, over to the Ashigara mountains to a barbecue site called Yuhi no Taki (evening light waterfall) and back to Machida.

After the Akiyama road with the first big climb near the Maglev track I reached PC1 at Tsuru with only about 15 minutes spare before control closing time. That set the tone for the day.

I was continually chasing the next closing time, thinking I’d probably make it but could never be too sure until I reached it. At the top of a mountain I would always find myself behind the minimum average speed of 15 km/h from the start, but on the next descent I’d gain just enough distance in a short time that I was a little bit ahead of the minimum at the next PC again. Most of the time I cycled alone, but I came across the same three or four cyclists again and again.

At Lake Kawaguchiko I couldn’t see Mt Fuji because it was too cloudy. Given the forecast, I hadn’t expected to see it.

The highest point was Kagosaka Toge, about 1100 m. From there the road dropped over 700 m, which is a pretty long descent. PC2 at the bottom was a grocery store, where I arrived just 12 minutes before control closing time. I bought bananas and climbed up Ashigara Toge (6 km).

On the other side I descended 6 km, then climbed a valley to a barbecue place which was a manned checkpoint (untimed). Staff had prepared grilled seafood and meat. They had saved some Frankfurter sausage and chicken for me, which I ate only 13 minutes before they had to clear out of the place. Then I descended to Oi-Matsuda and across a mix of rolling hills and busy urban roads back to Machida.

PC3 felt like the biggest challenge as traffic and traffic lights got denser, with the hills still unrelenting. I arrived at PC3 with 14 minutes spare. Two other cyclists arrived 3 and 5 minutes later, as I was preparing to head off again. Due to the overall 200 km time limit being 10 minutes longer than the 15 km/h equivalent time limit of all intermediate controls, I gained more breathing space at the final PC and could take it relatively easy for the remaining 26 km, which had yet more hills and traffic. It was then that I could stop worrying about time. I arrived at the goal 20 minutes before control closing time, with the other two guys following soon.

From there it was an untimed 5 km back to the reception site, the Cherubim bike shop in Machida. Three cyclists behind me also completed. Quite a few others DNF’ed (dropped out) due to various problems, including mechanical problems (a broken front derailleur, a ripped off rear derailleur after a crash, etc). We relaxed, celebrated and talked.

After the AJ NishiTokyo staff tidied up we took a group picture. I then cycled home from Cherubim to Setagaya. I got back at 23:30 with 242 km recorded on Strava and close to 2900 m of climbing, including the return ride.

The next day I felt a bit sore, but not too bad. The adrenaline of an event lets you do amazing things. My brevet speeds are always significantly higher than my personal ride times because there is always a ticking clock and/or other riders to chase. Knowing I can achieve goals in brevets that I don’t normally achieve on my own encourages me to become more ambitious and aim higher.

Disc brake wheel build for my Bike Friday

With the new fork with disc brake tabs for my Bike Friday Pocket Rocket due to arrive at Tokyo Bike Friday dealer ehicle very soon, I had Tim at GS Astuto build a new wheel for it. The rim is the same type (Alexrims DA22) that came with my bike originally, also in silver and 32H. The spokes are WheelSmith SS in a 3X lacing.

I am using the Shutter Precision PL-8 centerlock dynamo hub (silver, 32H) instead of the Shimano DH-3N80 (rim brake version) that I used before. The Shimano worked really well, but I couldn’t reuse it directly because it didn’t have the centerlock connector. The PL-8 is lighter and slightly more efficient. It’s been getting very good reviews. Perhaps my son will be able to reuse the Shimano hub for one of his bikes.

Here are some pictures of the new wheel, with and without brake rotor (SM RT-81):

Moving to Disc Brakes for the Bike Friday and Elephant NFE

Last week I bought a pair of mechanical Shimano BR-CX77 disc brakes for my Bike Friday Pocket Rocket. A friend of mine was selling them cheaply since he had upgraded to hydro/mechanical brakes.

Later this month I’ll receive a new fork with IS disc tabs for my Bike Friday and will install one of these using the 160F post mount adapter. Tokyo Bike Friday dealer ehicle will be installing the fork and a new threadless headset for me, allowing me to convert my nearly 4 year old BF to disc brakes at the front. For now I won’t be changing the rear triangle and the rim brakes at the back, since most of my braking has always been on the front.

Another friend of mine is interested in picking up the rear brake for his bike (his fork and front hub don’t support discs). Thus we both get a bargain price upgrade out of this pair.

Depending on how I like the second hand CX77 in action, I may then buy a new pair for use with my Elephant Bikes National Forest Explorer (NFE).

Here is an IRD Alpina-D front derailleur (FD) for the NFE. I’ll use it with my Spa Cycles TD-2 touring crank. It’s very similar to older Ultegra FD’s and works well with smaller chain rings:

Finally here is one of the Compass Babyshoe Pass Extralight tires (650Bx42) that I’ve bought for the NFE. These should make for a cushy but fast ride. A friend of mine is using the 700Cx32 Stampede Pass tires and loves them.

More reading about the NFE build:

Japan Coast to Coast Adventure Ride

A century ride in cycling terms is a ride of at least 160.9 km (100 miles) in a day. I started doing them in March 2012 and since then did one every month except August 2012. Thus my current streak started in September 2012 and August 2015 was month #36.

I wanted the ride completing 3 years of what some would consider insanity to be special, so I combined it with one of my New Year plans, a Japanese coast to coast ride. Around Tokyo “coast to coast” amounts to a distance around 350 km. Because of the size of the Kanto plain and because of the river valleys on the other side the route can be mostly flat, but with some mountains where you cross the watershed.

[View this ride on Strava or on RideWithGPS]

My friends Alan and Naomi had done a coast-to-coast ride back in 2009, so I asked them for the route, which turned out to be a great one. They sensibly did it in two days, staying overnight at Karuizawa, a resort town up in the mountains near the highest point, which is a popular escape from the summer heat for Tokyoites. For my friends it was a 190 km ride one day, followed by a 09:00 start for the 160 km ride the next day. They did it in early September, when it’s is still pretty hot here.

I got my son Shintaro to join me on this route, but decided to ratchet it up a notch for the three year ride, riding it without a nightly accommodation stay. We did it during August, during a heat wave when it was hotter in Tokyo than it was down in Singapore.

Shintaro had joined me for a 300 km brevet in March (his first) and had no problems completing it, so I guessed he would do OK with fitness.

We left home around 08:15 and headed over to Rainbow Bridge on Tokyo bay as the Pacific starting point. All the cycling roads are asphalted, so we basically rode on a black solar collector all day. The temperature in the city was already at 35 C. By the time we got out of town and followed the mostly exposed Arakawa river cycling roads, the temperature hit 40 C. It stayed between 39 and 43 C until the mid-afternoon as we made our way along the Arakawa and Tonegawa.

We drank plenty of water but the heat was brutal. We both carried two water bottles and refilled them at every opportunity. If we came across a tap by the time we had only gone through the first bottle, we always dumped the contents of the other one to refill it as well, because by then it was already as hot as bath water! By the late afternoon it became a bit easier.

By the time we reached the main climb to Usui Pass (about 900 m) near Karuizawa it was dark. As we gained elevation and the stars came out temperatures finally dropped below 30 C. All the curves on the Usui pass are numbered, from 1 to 184. The scariest moment of the ride was when we both, climbing separately, passed a grunting wild boar by the roadside. We both sped up in panic to get away as quickly as possible… Fortunately it didn’t chase us.

We reached Karuizawa 202 km from home around midnight. The roads were mostly deserted as we followed rolling hills, keenly anticipating the promised descent into Nagano prefecture. It took longer than expected before the long, fast descent began. The temperature had dropped to as low as 19 C and I put on a wind breaker.

Some time after 01:00 Shintaro started getting sleepy, so we pulled into a convenience store parking lot and found a sheltered place behind the building, where we lied down on the bare concrete to sleep, using our rinko bags (to wrap up the bike for train rides) as pillows. Around 04:30 we woke up again from the cold and decided to head on. Nagano was beautiful in the early morning light, with mist sitting on surrounding mountains.

As the morning turned into day it gradually heated up again. We mostly followed cycling roads on flood control dams along the rivers, away from traffic, but also exposed to direct sunshine. Despite using sunscreen my arms were red from sunburn and my son had trouble sitting after so many hours on his roadie saddle (he has a Brooks on his touring bike).

Around midday we got to the second highest climb of the course, from one river valley into the next. By that time we were both weary and just wanted to get to the coast, so we could say we finished the ride. We shared a bag of dried mangoes, my “secret weapon” for when rides get tough. I can’t say much about the final kilometres, except that we counted down the (estimated) distance to the coast during the hottest time of the day.

After 362 km, we made it.

We had some udon noodles at a restaurant near the train station, packed our bikes into the rinko bags and headed back to Tokyo via express train and the Shinkansen (bullet train). I slept most of the way. My wife picked us up by car at the station in Tokyo.

Having felt pretty exhausted on rides in the July heat ranging from 88 km to 164 km, I knew a coast to coast ride in this weather was going to be more crazy than fun. Nevertheless, I knew we could do it and wanted to go through the experience.

Whenever I’ll be uncomfortable on another ride, I’ll always be able to look back at this one and say to myself: “That coast to coast ride wasn’t easy either, but you made it. Don’t give up! 🙂 “

My Elephant Bikes National Forest Explorer

I have ordered a second bike, an Elephant Bikes National Forest Explorer (Elephant NFE). I wanted something with enough clearance for wider tyres and mudguards as well as disc brakes. I was looking for a light and lively frame for fast, comfortable rides (not planning any heavy duty touring). Lots of cyclocross (CX) bikes would have fit that bill, but none have low trail geometry like classic French randonneurs or my Bike Friday. Elephant Bike’s unique low trail disk fork is really what attracted me. The frame set is hand-made by bike builder Glen Copus in Spokane, WA.

The virtue of versatility
The Elephant NFE is probably one of the most versatile bikes around. I like versatile: My current Bike Friday Pocket Rocket, on which I’ve done about 30,000 km in less than 4 years, has served me well for anything from grocery shopping at the supermarket to 600 km randonées in the mountains of Japan. Road bikes optimized for racing on the other hand do well at exactly one purpose, racing. That’s something I’m not really interested in.

In an interview with Bicycle Times, Jan Heine (Bicycle Quarterly) contrasted the versatility of cars with more restricted designs on modern road bikes:

You buy a Porsche today, you can take it to the racetrack if you want and at the same time it’s fully equipped to drive to the office, you can get groceries on the way home, you can even take your girlfriend or wife to a resort, you can do all those functions in one car. On a racing bike, where are you going to put the groceries?

My idea of cycling is mostly one day touring. I ride to see places. I also love to take pictures of the places I visit. I often use the bike for distances that many people would use cars for, unless I have passengers. I don’t want to be restricted to daytime riding or clear skies or smooth roads or only part of the year. This goes back a long time: The first bike I bought as a 17 year old had mudguards and a rear rack. During one 5 month stretch in high school I put as much as 7500 km on it, including one solo ride of 220 km.

These days my threshold for a long ride is 160 km, a “century” distance. I don’t want to carry more luggage than I need in 24 hours, but but when you ride a whole day and go from sea level to half way up Mt Fuji and back, you need more stuff than fits in jersey pockets. I dislike heavy backpacks on a long ride. Therefore my idea of the ideal bike is not a race machine but a general purpose tool. My Bike Friday comes pretty close.

One thing I didn’t like about my current bike was brake performance in the rain. In June 2013 I rode home from the epic “Otsuki 4.5” mountain loop when I got caught in a massive downpour on top of Matsuhime (1,240 m). The Matsuhime descent in the rain on a 15% grade with wet rim brakes was no fun at all. Also I’ve had too many white-knuckle moments braking in traffic in the rain, when the calliper brakes first have to wipe the water off the rims before they they start biting on the next rotation. Disc brakes work in any weather and that settles it for me.

The search for another bike
Three and a half years ago I bought my first road bike in many years, a Bike Friday Pocket Rocket. This drop-bar road bike has 20″ wheels and folds small enough to pack into a regular size suitcase. I’ve been very happy with it, riding it through all seasons and putting three times more distance on it than I put on my car (a 2008 Prius). For both 2013 and 2014 I averaged more than 750 km per month and that’s even without a commute (I work from home). In March 2012 I signed up for a 300 km brevet three months later, then did three training rides of about 200 km for it. It was the first of many brevets. Except for August 2012 I have done at least one ride of 160 km or more every calendar month since March 2012 (a 33 month run from September 2012 to May 2015). In September 2013 I rode 574 km when trying my first 600 km brevet while in April 2015 I successfully completed a 400 km brevet.

Over these years, many people have suggested to me that I would find it easier to complete brevets or to keep up with other cyclists in group rides if I were to ride a 700C bike instead of my Bike Friday. I beg to disagree. The Bike Friday has actually been more comfortable than many conventional road bikes. Especially with 20 x 1 3/8″ (ETRTO 37-451) tyres at lower pressure, the bike vibrates less then narrow 23 mm road tyres pumped up to maximum pressure. The dynamo hub lighting, mud guards, Brooks saddle and the smart phone holder for easy navigation all help with long rides at all hours in any weather. It has been an extremely versatile and practical bike.

I have tried the 700C carbon road bikes of my wife and my son. I also tried a titanium bike lent to me by my friend Tim of GS Astuto. Yes, these big wheeled bikes roll more smoothly over speed bumps and other surface irregularities and they were lighter, which helped on many hills, but their gearing is also much higher, which is tough on really steep climbs. Due to the smaller wheels of my bike, the gearing of my road triple (50/39/30 chain rings + 11-28T cassette) works out more like that of a mountain bike (44/32/22 + 11-28T). The lightest gear of my son’s carbon road bike with compact crank is almost 50% heavier than my lightest gear. It’s actually heavier than the lightest gear on the middle chain ring of my Bike Friday triple.

Heavy gears are not only a problem when I get tired towards the end of a 13 hour ride. I also find that when I grind higher gears with more torque at lower cadences I may go faster, but I often pay for it with knee pain afterwards. I don’t really want to take any chances with my knees, as I intend to keep on riding into old age. Knee pain has been the reason I stopped running. I don’t want it to end my cycling.

I found the gear range of 22-92 gear inches on my Bike Friday perfect for me. I don’t need any gears for pedalling faster than 45 km/h, as on a long ride I rarely even do as much as 30 km/h on the flat. However I will often encounter steep hills that I can only crawl up at 6 km/h. Low gearing lets me do that at 60 rpm while still seated and my knees will thank me for it.

So while I was looking for possible new bikes with disc brakes or other nice features, the question of how to keep my low gearing prevented me from going for most off-the-shelf bikes. I would have to start from a frame set and add components that will work for me.

Low trail geometry
I had noticed that the steering on my Bike Friday felt different from 700C road bikes and put it down to the difference in mass of the wheels. The steering of the Bike Friday felt quick, but at the same time it didn’t seem affected as much by sudden gusts of wind from the side. To me it felt like the Bike Friday was easy to control via the handle bar input whereas the big bikes responded more to the rider shifting his weight around. I started reading about Jan Heine and his rediscovery of mid-century French randonneur bikes with low trail geometries, which work well for front-mounted loads. Their steering was supposed to feel like that. Then I found out that the Bike Friday, by virtue of its short fork, also had low trail geometry. That made me very curious about low trail road bikes.

As if finding a road bike with low gearing that was neither a heavy touring bike nor like a mountain bike wasn’t difficult enough, I started looking around if anyone made a bike with low trail geometry that also offered disc brakes, my primary reason to look beyond the Bike Friday. For months I didn’t come across anything. Many low-trail proponents are also sceptics with regards to certain bicycle innovations. For example, Jan Heine still uses a 5-speed freewheel like I did in the 1970s and doesn’t use integrated shifters (e.g. Shimano STI).

A couple of months ago I came across an article by Alex Wetmore in which he described a custom-built low-trail fork with traditional bend but with disc brakes.

Then a couple of weeks ago I came across a mention of a 650B bike with disc brakes in a comment posted on Jan Heine’s blog (https://janheine.wordpress.com/2015/04/04/the-enduro-allroad-bike/), called the Elephant National Forest Explorer. I googled the bike. The fork in the first picture I came across looked exactly like the one I had seen on Alex Wetmore’s blog. That was because builder Glen Copus based it on Alex’ proven design when he built an NFE for Fred Blasdel.

The next day I sent an email to John Speare of Elephant Bikes. He told me they were going to do another production run in a couple of weeks. A week later I got an email that they were taking orders now. It was an easy decision: There is no other bike like it. I sent my deposit the next day. I will probably get the frame and fork in August and hopefully start riding the bike in September.

Planning the build
I still haven’t decided how to get my low gears, but it will have to work with Shimano STI so I can shift and brake from the same hand position for urban riding. The choice is between a compact plus double crank (e.g. 42/26), a touring triple (e.g. 46/34/24) or a road triple with large cassette (e.g. the new Tiagra 4703). Either of those will give me the gears I need.

The plan is to build up the NFE with a dynamo hub (Shutter Precision PL-8), a Brooks saddle (B17), a porteur front rack with a bag and some supple, wide 650B tyres such as the 42 mm wide Compass Babyshoe Pass EL.

A front rack gives easy access to items you need during rides without having to dismount. Since the weight rests on the normally much more lightly loaded front wheel it doesn’t require beefing up the whole frame as in typical touring bikes. Thus you get both load carrying ability and a light, fast frame – a perfect combination.

Stay tuned for the first ride reports later this year 🙂

400 km in 26 hours on a Bike Friday

On April 18/19 I rode the BRM418 Fuji Omawari (“Fuji Big Loop”) 400 km brevet by AJ NishiTokyo. It was part of my quest to complete 200-300-400-600 km brevets in one year for the Super Randonneur title. Those four are also needed to qualify for Paris-Brest-Paris this August, which I’m not seriously planning for.

The course had a 27 hour time limit, from 07:00 on Saturday to 10:00 on Sunday. The total elevation gain of the course is about 3700 m over an official distance of 402.4 km. There were five check points (PC1-5, point de contrôle), all of them convenience stores from which we needed to get receipts, plus one quiz check point halfway to PC1.

As for most AJ NishiTokyo events the start and finish were at the Cherubim bike shop in Machida. From there the course heads out via Doshi michi (Rt413) to Yamanako (Lake Yamanaka), past Motosuko (Lake Motosu) to Minami Alps city, then down to the coast, across Izu to Ito, Atami, Odawara and back to Machida.

Though it might look like most of the climbing was in the first quarter because of the highest elevation there, there is more total elevation gain yet to come after the big descent from the Fuji five lake area.

I had tried this event last year but around the half-way point started to fade badly from lack of sleep . There was no way I could make the remaining control closing times. Even after sleeping some time I decided not to cycle all the way back but to take the train from Odawara station, so I didn’t even do the full distance.

To prevent a repeat of this outcome I decided to:
1) get more sleep upfront and
2) not to bring a rinko bag on the ride 🙂

I also rode the complete course as a personal ride without time limit two weeks before the event, Tokyo to Tokyo (460+ km total). This gave me a better feel for the course, for how my body would react and what clothes would be appropriate this season. And it worked!

On Friday night I checked into a cheap hotel near Machida so I would have a quiet early night and wouldn’t have to take the bike on the first train in the morning to make it to the registration desk by 06:00, before the briefing at 06:30. At 5000 yen the hotel was cheap, but the supposedly non-smoking room reeked of cigarette smoke. It was hot and stuffy too, so I woke up several times. Unfortunately the similarly priced but much nicer Toyoko Inn in Sagamihara where I had staid before BRM110 in January was full…

Saturday morning started out sunny, but I had packed my rain gear in case of rain on Sunday and as an extra layer if it got too cold at night. I never needed it during the ride: A wind breaker was enough for the cold and it didn’t start drizzling until Sunday afternoon.

On the way to the start I bought some bananas for breakfast. At the briefing we were told about some course changes in the latest version of the cue sheet, then a safety check and we were off. I think I was the only one at the start without leg warmers.

Doshi michi has a lot of ups and downs before it reaches the 1114 m pass before Yamanakako, so you actually climb something like 1700 m up to that point and we also faced head winds. I think I was passed by almost all participants by the time I reached the lake.

Unlike at the ride two weeks earlier Fuji was visible this time.

I was wearing my shorts and no wind breaker. For that it was chilly, especially at Motosuko which was covered in low clouds with only 7 degrees C according to a road side display. The coldest point of the ride was not before sunrise in Izu but at noon at Motosuko.

Due to the amount of climbing I was running about 20 minutes behind the minimum average speed for PC closing times by then. Not coincidentally though, PC1 had been placed after a long fast descent at much lower elevation, so we could make up a lot of lost time. It was extremely windy on the steep Rt300 descent the other side of the Motosuko tunnel, but temperatures also got much milder again.

I made it to PC1 (a Seven 11 at 125 km) 20 minutes before closing time, then on to PC2 (a Lawson) in Minami Alps at 152 km, also with only 20 minutes spare.

After PC2 came a long downhill stretch, which was great for recovery. The Yamanashi side of Mt Fuji staid in full view for a long time.

As the sun set we joined Rt52 towards the coast, a fast flat road with a fair amount of traffic.

I passed a few other cyclists before we got to the hilly section leading to PC3 (a Circle K at Shibakawa, 217 km). This is where it started to get difficult last year, but not this time: After riding this section in the rain after midnight two weeks earlier, it felt downright comfortable in evening hours in the dry.

I was wondering where I would get really sleepy. I didn’t think I was so well prepared after that hotel stay, but my pace didn’t drop. At the Ministop that served as PC4 in Izu (km 275) I found myself an hour ahead of closing time. Several others took a nap at the conbini. I was too excited to nap and had a cup of coffee instead.

In the dark on the pass over to the east coast of Izu I startled a small deer and later some racoon-like animal, but nothing scary.

There are four climbs on the coastal road before Odawara, each one several km long. I didn’t take any pictures in the early dawn. It was cool and overcast, not clear and warm as when I passed there last year:

Near Atami I stopped for my third cup of coffee at a conbini as I was feeling sleepy, when an accident happened outside. A group of Randonneurs who were part of a different event had passed and one of them had his front wheel caught in a gap in a sewer grate. He had landed head first on the road, cracked his helmet and probably broke his nose. When I got there he was lying flat on his back on the side walk, with a handkerchief covering his face, not moving but conscious. There was blood on the road. His friends had called an ambulance which soon arrived. The other cyclists then asked us to continue. That situation kind of woke me up again. Ours is a dangerous sport indeed! Drafting in a group does have aerodynamic benefits, but only the lead man gets an unobstructed view of the road ahead.

I made it to the last big climb before Odawara as the sun came up and knew I was looking good on time. There were several other randonneurs that I kept seeing as we stopped at different times but were basically at a similar pace. At PC5 (366 km) I knew I could make it to Machida even if I only averaged 15 km/h, with only 36 km and no real hills to go in light Sunday morning traffic.

“You’re riding 400 km on THAT?” asked a female cyclist, pointing at my Bike Friday as I was having milk tea and sandwiches outside the last conbini. The people who see me regularly at AJ NishiTokyo events are no longer surprised that I do these long distance rides on a road bike with small wheels that happens to fold, but many others still find it hard to believe you don’t have to pedal more. Thankfully somebody back in the 1880s invented something called the “safety bicycle” with gears and a chain, a novel design that broke the 1 pedal revolution = 1 wheel revolution link of the “ordinary bicycle” that had preceded it. So I can assure them that on a 400 km ride I don’t need to pedal any more than somebody riding the same event on a 700C bike and the relative position of the contact points (seat, pedals, handle bar) is the same too.

I got to Machida with a big grin on my face, rolling up in front of Cherubim at 09:01, 59 minutes before the 10:00 closing time. I had my brevet card checked, showed my receipts and the quiz point photograph, then sat down for refreshments and a chat. More cyclists arrived, one or two at a time. The very last one still on the course literally made it at the last minute, arriving at 09:59 to general cheers 🙂

My next brevet will be BRM530 to Suwako (Lake Suwa in Nagano) and back, a 600 km ride. Going without sleep for its entire 40 hour time limit won’t be an option there, but I’ll try to prepare well. I’ve cycled most of the route in 2013 and 2014 already.

A couple of days before the brevet I ordered N+1, an Elephant Bikes NFE frame set. It’s basically a low trail geometry randonneur bike with disc brakes. Production will start next month and I should receive it in August.

So this autumn I’ll probably be doing the “Kintaro” (Ashigara) and “Shiokatsuo” (West Izu) 200 km brevets on new 650B wheels with a dynamo hub and discs that Tim (GS Astuto) will be building for the new green bike.

Sensible gearing for non-racing road bikes

The vast majority of cyclists who ride road bikes never compete in bicycle races. Nevertheless, the gearing of the bikes they ride is optimized for racing and not for the kind of cycling the bikes are actually used for.

Typical road bikes come with a double chain ring at the front, with a 50/34T or 52/36T (compact double) or 53/39T combination. The cassette at the rear will come with a smallest sprocket of 11 or 12T, with the large sprocket ranging anywhere from 23T to 30T. A highest gear of 52×12 or 50×11 is essentially useless to the vast majority of cyclists. Crank sets of 46/30T, 44/28T, 42/26T or 40/24T would make more sense for most cyclists who are using a double.

A typical trained amateur can sustain an output of about 3 W per kg of body weight for one hour. At 70 kg that’s about 210 W, enough to sustain 35 km/h for that hour. That’s about the 4th tallest gear on a 700C road bike (50×14 at 80 cadence). Higher gears are only usable for very short sprints during races or downhill or while drafting behind others.

Those high gears do make sense in races. Pro athletes can sustain 5-6 W per kg of body weight for an hour and much more for a few minutes or seconds, such as a sprint finish in which they may hit speeds in excess of 60 km/h.

During road races cyclists ride in a large bunch known as the peloton that provides considerable aerodynamic benefits. While the peloton at the Tour de France will cruise for half a day at speeds of around 45 km/h, few cyclists I know will cruise faster than 30-35 km/h in group rides, less than that when they ride longer distances or individually. On rides of more than 100 km on my own I will spend very little time exceeding 25-28 km/h on flat terrain.

When Eddie Merckx set his famous 1 hour record, he used a 52×14 gear combination, which is 18% shorter (i.e. lighter) than 50×11. His average cadence was 102 rpm. At 50×11 it would be 83 rpm. Even with a typical cyclocross top gear of 46-11, his average speed corresponds to a cadence no higher than 90 rpm. So why does Shimano sell heavier gears for amateur cyclist use than Eddie Merckx used when he was at his peak? That isn’t what they need at all.

People buy bicycles not just because they enjoy riding them, but also for status. That’s how they are marketed. Road bikes that look similar to what the pros ride command higher prices and are more profitable. Selling racing-optimized components to non-racers is a way of getting customers to spend more money on things to be seen with rather than on things to use.

One downside of the high, racing-oriented gearing are unnecessarily high lowest gears. With a 20-speed bike you shouldn’t have to get out of the saddle and stand on the pedals to be able to make it up a steep hill. If you can’t maintain a cadence of 70 rpm, your current gear is too tall. Same if you have to get off and walk or if your legs cramp up. A large outer chain ring that makes the smaller sprockets on your cassette unusable also forces you to sooner switch to the inner chain ring on slight climbs or to drop cadence to avoid front switches.

It doesn’t have to be that way. Lower gearing can be achieved via smaller chain rings at the front, larger cassettes at the rear, smaller wheels or a combination thereof. Yet road cyclists are offered few of these options. Shimano, SRAM and Campagnolo, the big three bicycle component makers, provide very little choice when it comes to derailleur geared road bikes. Still, there are some options.

Let’s take a look at them.

Mountain Bike Cranks

Mountain bikes and trekking bikes are available with double and triple chain rings, with large rings as small as 36T and small rings as small as 22T. For example, the Deore XT FC-T781-S is available as a 44-32-24, which provides low enough gearing for grades of 14% and more and high enough gears for 30+ km/h cruising. MTB cranks are readily available and affordable.

One problem is that MTB cranks have a wide Q factor (pedal-to-pedal distance), which some cyclists have a problem with. Also, their chain line is wider than that of a road double or triple, which can cause problems when trying to use a road derailleur as it may not reach out far enough. Shimano MTB front derailleurs on the other hand are not compatible with Shimano road shifters because of different pull ratios and MTB shifters are not designed to be used on drop bars.

If you are able to make the MTB crank chain line work OK with road shifters and don’t have problems with the wider Q factor, good for you!

Road Cranks With Large Cassettes

Shimano road cranks use a 130 mm bolt circle diameter (BCD) for the outer ring and 110 mm for the inner ring, which limits the smallest inner ring to 34T. Your only option of getting a lower lowest gear is a bigger cassette. Cassettes are limited by what number of teeth your rear derailleur (RD) can handle. Medium and long cage RDs handle bigger cogs as well as bigger differences between the small and large gears than do short cage RDs. A 9 or 10 speed road RD can also be replaced with a 9 speed MTB RD for more capacity, as they are pull compatible. This allows cassettes up to 36T. The drawback of bigger cassettes is extra weight and less closely spaced gears that require bigger cadence changes when changing gears.

Cyclocross Bikes (CX)

Cyclocross bikes usually come with 46+36T cranks, which avoid the big jumps in chain ring size of road compacts (10 vs. 16T difference). The 46T is more usable than a 50 or 52, but because of the 110 mm BCD of both rings, no inner chain ring smaller than 34T can be installed. So with a CX crank, larger cassettes are the only option for lower gearing, just like with road cranks.

Road Triples

Typical road triples offer 50-39-30T combinations, but manufacturers have gradually been getting rid of them. SRAM completely stopped making road triples. Except for their MTB group sets, they only sell doubles now. Shimano dropped the triple option for Dura Ace with 7900. Next in line was Ultegra, where 6703 was the last triple, followed by 11 speed double 6800. Finally it was 105’s turn, which went to 11 speed double-only when 5800 came out. Now Tiagra 4603 is the only group still offering a triple. Older 105 5703 and Ultegra 6703 parts are still available, but not on new bikes. None of the electronic shifting group sets from any manufacturer, such as Shimano Di2, support triple. Ultegra 6770 support 10 speed doubles, while Ultegra 6870 supports 11 speed doubles.

With both the 105 and Ultegra triples the small chain ring uses a 74mm BCD and can be replaced with smaller 74mm BCD rings down to 28T, 26T and even 24T, for example the TA Zelito range. This is not possible on the current Tiagra 4603, where the inner is bolted to the middle ring.

Some people remove the 50T of road triples and change the middle to a different size, to convert the road triple into a “compact plus” double such as 44+28T or 42+26T. Having only two chain rings then, this can even be combined with an electronic FD. I have heard from at least one person who uses Di2 with a 105 5700 triple-derived 44+28T double.

Triple cranks are still made by several other players besides the big three. One of the most well known and respected is Sugino. For 9 speed there is their XD-2, which is good value. You can get in 46/36/24T. For 10 speed there is the Alpina 2 triple, which can be a bit hard to find with the right ring sizes. The 110/74 mm BCD means the inner can go as low as 24T while the middle can be no smaller than 34T (technically, 33T but nobody uses those).

If you’re using STI shifters then ramped and pinned rings work best for the middle and outer rings. Some purists still use down tube shifters or bar end shifters, which will work with any rings, but having used STI I simply can’t go back to the 1970s for shifting. The ability to use both the brakes and the shifters from the hand position in which I spend most of my riding is invaluable, especially when riding in populated areas.

Compact Plus Doubles

Sugino also makes doubles using 110/74 mm BCD that allow you to use inner rings smaller than the 34T limit of typical road and cyclocross doubles. The Sugino OX801D, which Sugino calls a “compact plus” does not suffer the 34T limit for the inner ring. It combines the chain line and narrow Q factor of a double with the ability to use smaller inners of a triple.

A trekking bike-oriented variant, the ZX801D aka ZX110 OX801D can be had with smaller rings from 44/28T down to 40/24T. It’s chain line is MTB-like and it uses spacers when used with a 68 mm bottom bracket. Both the OX801D and the ZX801D are compatible with 9 and 10 speed drive trains, with modern ramped and pinned chain rings for STI compatibility.

Internal Geared Hubs (IGH)

Just like single speed bikes, hub geared bikes are relatively flexible in their gearing because there is only a single sprocket at the front and the rear, the selection of which moves the internally available gear range up or down as needed.

The Rohloff Speedhub 500/14 gives you 14 equally spaced gears covering a total range of 526%. It is robust, low maintenance and efficient. On the other hand it’s very costly, fairly heavy and not compatible with drop handle bars or with electronic shifting. It’s a good match for high end touring bikes.

A cheaper alternative to the Speedhub is the Alfine 8 speed and 11 speed by Shimano. The Alfine 8 offers a gear range of 308% while the Alfine 11 covers 409%. A good touring bike should have a gear range of 450% or more. There the Alfine 8 falls short, while the 11 comes close. From what I hear, something as simple as fixing a puncture can be quite unpleasant with the Alfine.

Alfine IGH can now be combined with electronic shifting. For the mechanical version there are the Shimano STI-like Versa brifters.

The Alfine models are more expensive and heavier than derailleur gears but neither as expensive nor as efficient as the Rohloff Speedhub. Pick your poison!

Smaller wheels

When I bought my Bike Friday, a road bike with 20″ wheels that will fold, the low gearing was almost by accident. Yes, I did specify it as a triple (50/39/30T with 11-28T cassette), but the smaller wheels (451 mm vs/. 622 mm on a 700C) make for 33% lighter gears on top of that. That means my road triple gearing works more like a MTB 44-32-24 than triple setups available for 700C road bikes. That suits me fine. I can still pedal downhill at 45 km/h in my top gear if I feel like it, but I can also climb the steepest climbs at 6 km/h at 60 rpm.

It was only when I started looking at what kind of gearing I would need to maintain my comfortable climbing ability on a 700C or 650B that I realized what a blessing the smaller wheel size can be for gearing options.

The triple has also worked well for me. Because the middle ring has significant range overlap with both adjacent rings, the jumps either way are easy (about 30%), which encourages you not to postpone front shifts and to always use the most suitable ring. On flat roads I mostly ride in the big rings, except where the road is busy and I may have to stop a lot, or if I’m tired or facing a head wind. The middle works for almost anything when I’m not in a hurry and not on steep hills. On wet roads I’m more likely to encounter traction problems with the rear wheel before running out of gears on the inner. I use the inner with the lighter half of the cassette and never feel guilty about dropping into it, because it keeps my cadence high enough. In a car you wouldn’t think twice about reving the engine to go up a steep mountain, so why not on a bike?

I may not be a fast climber, but I have never suffered from leg cramps or walked up a mountain road because it was too steep. Having sensible gearing is part of the reason.

Further reading:

A 242 km January bike ride

On January 10 I rode my first brevet of 2015, “BRM110 Miura peninsula 200 km” by AJ NishiTokyo. The 204 km course started and finished in Machida while the middle portion followed the Kanagawa coastline around Miura peninsula. Total elevation gain was a little over 900 m, far less than the more typical 2000-3000m in other AJ NishiTokyo 200 km events. It was also far less windy on the Miura coast than on most of my winter rides there. There were about 70 participants and I rode with others for most of the route.

The previous evening I cycled to a cheap business hotel near the start (Toyoko Inn in Fuchinobe) and went to bed early. I got up at 04:00, left at 05:00 and attended the pre-ride briefing at 05:40.

With the clear night sky, temperatures were close to freezing when we set off at 06:00, almost an hour before sunrise. The dawn was pretty along the Tamagawa, but when the sun rose it was right in our faces, which must have made it challenging for cars and trucks passing us.

After 40 km we left the river and turned onto major Rt15. We reached PC1 (Point de Controle #1, in this case a convenience store) at km 43. Here are some bikes of fellow participants, ranging from a custom built Japanese Cherubim bike with Rohloff Speedhub to a mamachari (shopping bike). Most cyclists at Japanese brevets ride regular carbon or aluminium frame road bikes.

My next stop was at Yamashita koen in Yokohama. From there to near the Yokosuka naval base the road has many traffic lights so even though it’s mostly flat, you can’t maintain a fast pace. The real scenic peninsula starts south of Yokosuka. I love the views across Tokyo bay to Boso peninsula on the opposite side. You can see many boats, from container ships to oil tankers to LNG tankers, on their way to and from Tokyo, Kawasaki and Yokohama.

After 119 km I reached PC2 in Misaki, where I got my brevet card signed by a staff member (at PC1 and PC3 we needed to collect shopping receipts).

Heading north from there towards Zushi and and Kamakura on the west coast of the peninsula I was treated to one stunning Mt Fuji view after another. January is really the best time for them, because the air is so dry. At other times of the year the mountain is often obscured by clouds, even if you could see far enough.

Here are some guys preparing a bonfire for a shrine festival:

Near Chigasaki we turned away from the coast and soon reached PC3 near Samukawa (km 168). I was told I was #38, so around the middle of the field. With only 36 km to go to the finish and 1 1/2 hours ahead of cut-off time I felt really good. Furthermore, I still had over an hour of daylight. I had worked really hard for the first three hours, then dropped the pace a bit but overall made good time. So I enjoyed my first cup of coffee of the day, then headed on.

Another participant decided to follow me and my GPS to save himself navigating by his paper maps and notes. Once we got closer to the finish and he found himself in familiar territory he decided to drop off the back while I continued at my pace. I arrived at the finish at 18:06, 12 hour and 6 minutes from the start, which is my best 200 km time ever.

After handing in my brevet card and having my receipts checked I hung out with other finishers with food and drinks, chatting for a while. Then I headed on, riding another 30 km back to Setagaya/Tokyo in the dark. My winter gloves turned out too cold from the sweat, so I stopped at another convenience store to defrost my hands and pick up some cheap knit gloves for the ride home. Strava reported a total of 242 km for the day.

That makes January my 29th consecutive month with at least one Century ride (160+ km).